Introduction
Are you looking at the footprint of a recovering apex predator, or just a large domestic dog that wandered off the trail?
That question has to be answered at the track site, not later over a cropped phone photo. Rain softens edges. Sun opens snow. A boot print beside the trail can destroy the only clean heel pad before anyone measures it.
For conservationists watching the eastern cougar's former range, a track is not a sighting story. It is physical evidence with a location, a substrate, a direction of travel, and a short life span. The value rises sharply when the observer records scale and context before weather, foot traffic, or thawing changes the print surface.
The working method is comparative. First, separate feline from canine. Then separate cougar from bobcat. After that, read the trail pattern and check what the ground has done to the print. Species identification from one attractive feature invites error; a field record needs several marks pointing in the same direction.
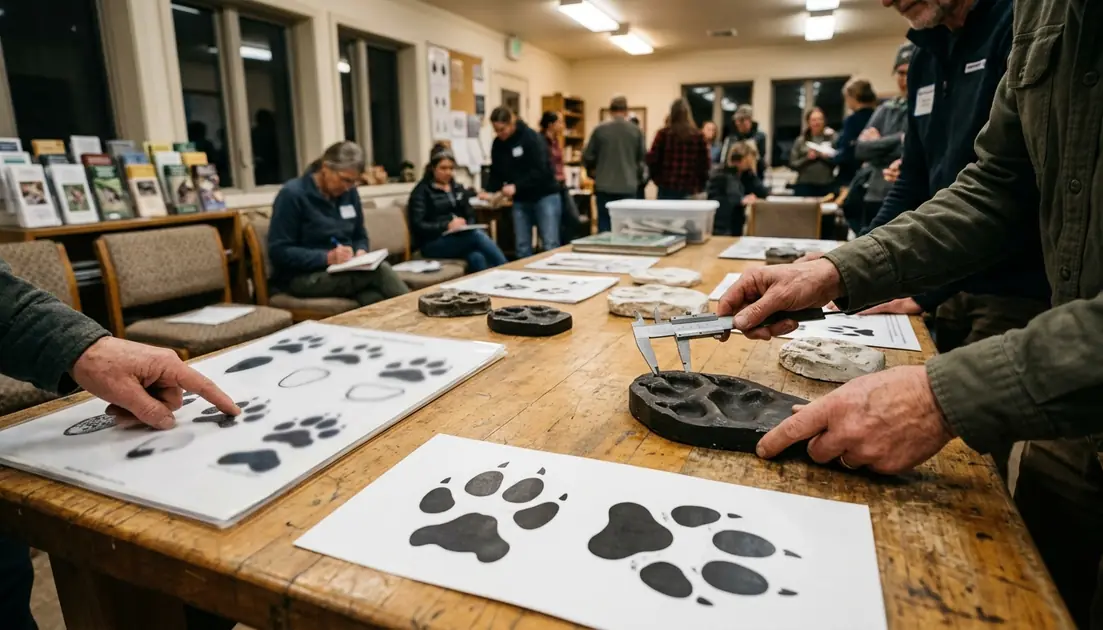
The Anatomy of a Track: Feline vs. Canine
Anatomy should come before excitement. A single big track in mud can look persuasive, especially when the heel pad is deep and the toes look rounded. The better approach moves from the whole print layout to the heel pad, then to claws.
Run the X Test First
Canine tracks often leave open negative space between the toe pads and the heel pad. In dog and coyote tracks, a tracker can usually draw an imaginary 'X' through that open space without cutting through the pads. That symmetry gives the track a tight, forward-pointing look.
Cougar tracks usually break that pattern. The toes sit asymmetrically, with one leading toe set slightly ahead of the others. The print feels wider, rounder, and less balanced than a typical dog track. It does not offer the same clean X-shaped channel.
Read the Heel Pad
The heel pad carries some of the strongest evidence. A cougar heel pad typically shows two lobes on the leading edge and three lobes on the rear edge, creating the classic feline M-shaped or scalloped rear margin. Domestic dog heel pads commonly show one leading lobe and two rear lobes, with a more triangular or shield-like central pad.
Check for Claws, Then Check Again
Felines retract their claws, so cougar and bobcat tracks usually lack claw marks. Claw tips may show if the animal slipped, sprinted, accelerated, or moved through a substrate that caught the tips. Dogs carry their claws forward, and those claws often stamp blunt indentations ahead of the toes.
The National Park Service guidelines on mountain lion track identification use the same baseline features: four toes, asymmetrical toe placement, a large tri-lobed heel pad, and claw marks that are usually absent.
Caution: A large domestic dog may produce a 3-inch-plus print, but the X-shaped negative space, blunt claw marks, and wandering trail pattern usually expose the canine source.
Sizing Up the Evidence: Cougar vs. Bobcat
Once the track passes the feline filter, shape becomes less decisive. Bobcats and cougars share the same family blueprint: four toes, asymmetrical arrangement, and a heel pad with feline lobes. Scale becomes the primary discriminator.
Adult cougar tracks are typically 3 to 4 inches wide when measured across the widest part of the front track. Bobcat tracks rarely exceed 2 inches wide. That difference sounds simple on paper, but field surfaces do not behave like paper.
Measure the Right Print
Measure the front track separately from the hind track when possible. Front feet usually run larger because they carry more body mass. A hind print alone can understate the animal, while a distorted front print can overstate it.
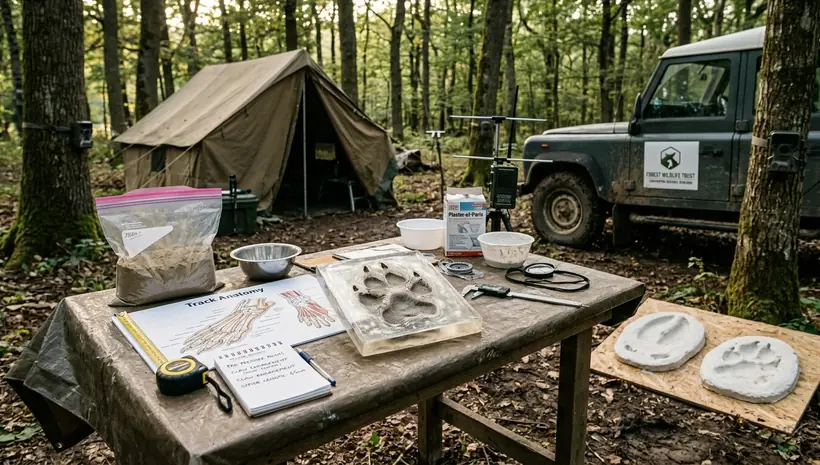
A ruler, measuring tape, or gridded field card belongs in the kit. A boot, finger, glove, or trekking pole creates a casual comparison, not a defensible scale for later review. The reviewer needs to see the measurement in the same plane as the track.
Main Point: After a track looks feline, width is not optional. It is the field step that separates a plausible cougar lead from a common bobcat record.
There is a practical reason for that discipline. A bobcat track with crisp lobe detail can look more convincing than a cougar track smeared by mud. The measuring tool keeps the observer from rewarding the prettier print.
Analyzing the Stride and Trail Pattern
A single print asks one question. A trail asks several.
After the best track is photographed, the observer should step to the side of the travel line and look for consecutive impressions. The goal is to learn how the animal moved, not just what one foot looked like in one patch of substrate.
Direct Registering
Cougars and bobcats often direct register when walking quietly. The hind foot lands in, or very near, the front-foot track. On soft ground, that can produce a clean doubled impression rather than two separate marks. This gait limits noise and reduces the number of footfalls that press into the surface.
Domestic dogs usually tell a different story. Their lines wander. Their spacing varies. They scuff, veer toward scent objects, drift along trail edges, and leave side-to-side curiosity marks near human paths. Even when a dog drops one large, roundish print, the broader trail often looks messy.
Use Stride as a Second Scale
Stride should be measured from one track to the next corresponding track along the line of travel. A longer, more powerful gait can help rule out bobcat when print size and trail width also support cougar. It should not override anatomy, but it can strengthen or weaken the whole case.
This is where field verification becomes slower than casual identification. The strongest record is not the biggest print. It is the print that fits the pad anatomy, the measured width, and the movement pattern in sequence.
Substrate Distortion and Environmental Context
Perfect tracks are rare. The ground edits the evidence before the observer arrives.

Damp silt may preserve heel-pad lobes sharply. Dry sand often collapses into the track walls and erases the same fine margins. Mud can exaggerate depth, merge toe-pad edges, and make the heel pad look broader than the actual foot. Pine needles, leaf litter, and duff can hide claw marks, obscure lobes, or create false edges where debris springs back.
Snow Melt Expansion
Snow deserves special caution. A bobcat or coyote track can melt outward after sun exposure, warm rain, or a freeze-thaw cycle. The enlarged print may reach cougar-like dimensions even though the original paw was smaller.
That failure case drives many false positives. The observer measures width alone, sees a large number, and skips the harder questions: Are the edges fresh? Do the toes retain structure? Does the trail pattern match the animal being claimed?
Expert Tip: Treat one distorted track in melting snow, crumbling sand, or trampled mud as a lead for further documentation, not as stand-alone confirmation of cougar presence.
This qualifier matters for conservation work. A field record should survive review by someone who was not standing beside the track. Substrate notes give that reviewer a way to judge whether the print shape came from an animal's foot or from the ground changing after impact.
Documenting Your Find for Conservationists
The best identification method still fails if the evidence cannot be reviewed. A conservation office, wildlife biologist, or tracking specialist needs scale, context, and sequence. A dramatic close-up alone rarely carries enough information.
Step-by-Step Field Protocol
- Stop before entering the track line. Approach from the side so the travel pattern stays intact.
- Photograph the clearest print straight down. Hold the camera lens parallel to the ground to reduce perspective distortion.
- Place a standardized scale beside the print. A ruler is best. A coin, compass, or field notebook scale can help if it lies flat on the same surface plane as the track.
- Measure width and length. Record width across the widest part of the print and note whether the measurement comes from a front or hind track when that can be determined.
- Photograph the trail. Capture a wider view showing several tracks in sequence, then take a habitat-context image that shows trail, substrate, slope, and nearby cover.
- Record the field conditions. Write down date, time, location, substrate, weather, direction of travel, track dimensions, and the number of visible consecutive impressions.
A simple sequence of three images usually tells more than a dozen tight close-ups: one scaled print, one line of travel, and one habitat frame. The reviewer can then compare anatomy, movement, and substrate without guessing where the print sat in the landscape.
What to Send With the Photos
- Precise location information, recorded as accurately as the observer can provide.
- Substrate type, such as mud, sand, snow, silt, duff, or leaf litter.
- Recent weather, especially thawing, rain, or freeze-thaw conditions.
- Track width, track length, and the tool used for scale.
- Direction of travel and the number of consecutive impressions visible.
Careful documentation does not make every suspected track a cougar record. It does something more useful: it separates field evidence that can be tested from a report that can only be retold.
The field mark worth remembering is this: a cougar's heel pad features three distinct lobes at the rear, a shape that lets the foot silently absorb the impact of a horizontal leap that can span roughly 40 feet.